
How to contribute
Author: Nicolas Rougier
Foreword
Use the topic keyword for any forewords
Chapters contents
Make sure to read this Documentation style guide [1] as well as these tips, tricks [2] and conventions about documentation content and workflows.
How to contribute ?
If you spot typos, unclear or clumsy wording in the lecture notes, please help to improve them. Simple text editing can be done by editing files in your GitHub fork of the lecture notes. On every html page of the lecture notes, an edit button on the top right links to the editable source of the page (you still need to create a fork of the project). Edit the source and choose “Create a new branch for this commit and start a pull request”.
Choose a topic that is not yet covered and write it up !
First create a new issue on GitHub to explain the topic which you would like to cover, in order to discuss with editors and contributors about the scope of the future tutorial.
Then create a new directory inside one of the chapters directories (
intro,advanced, orpackages) and create a fileindex.rstfor the new tutorial. Add the new file in the table of contents of the corresponding chapter (in itsindex.rst).
Keep in mind that tutorials are to be taught at different places and different parts may be combined into a course on Python for scientific computing. Thus you want them to be interactive and reasonably short (one to two hours).
Last but not least, the goal of this material is to provide a concise text to learn the main features of the scientific Python ecosystem. If you want to contribute to reference material, we suggest that you contribute to the documentation of the specific packages that you are interested in.
Using GitHub
The easiest way to make your own version of this teaching material is to fork it under GitHub, and use the git version control system to maintain your own fork. For this, all you have to do is create an account on GitHub and click on the fork button, on the top right of this page. You can use git to pull from your fork, and push back to it the changes. If you want to contribute the changes back, just fill a pull request, using the button on the top of your fork’s page.
Several resources are available online to learn git and GitHub, such as https://try.github.io for complete beginners.
Please refrain from modifying the Makefile unless it is absolutely necessary.
Keeping it concise: collapsing paragraphs
The HTML output is used for displaying on screen while teaching. The goal
is to have the same material displayed as in the notes. Thus there needs
to be a very concise display, with bullet-lists rather than full-blown
paragraphs and sentences. For more elaborate discussions that people can
read and refer to, please use the tip sphinx directive. It creates
collapsible paragraphs, that can be hidden during an oral
presentation:
.. tip::

    Here insert a full-blown discussion, that will be collapsable in
    the HTML version.

    It can span on multiple paragraphs
This renders as:
Tip
Here insert a full-blown discussion, that will be collapsable in the HTML version.
It can span on multiple paragraphs
Figures and code examples
We do not check figures in the repository.
Any figure must be generated from a python script that needs to be named
plot_xxx.py (xxx can be anything of course) and put into the examples
directory. The generated image will be named from the script name.
This is the way to include your image and link it to the code:
.. image::  auto_examples/images/sphx_glr_plot_simple_001.png
  :target: auto_examples/plot_simple.html
You can display the corresponding code using the literal-include
directive.
"""
A simple example
=================
"""
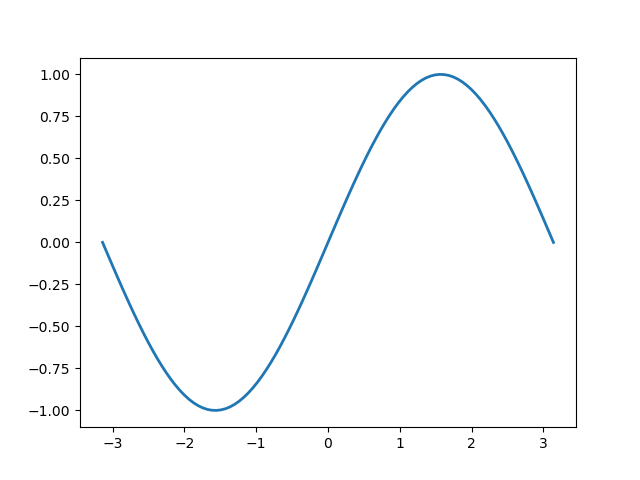
import numpy as np
import matplotlib.pyplot as plt
X = np.linspace(-np.pi, np.pi, 100)
Y = np.sin(X)
plt.plot(X, Y, linewidth=2)
plt.show()
Note
The transformation of Python scripts into figures and galleries of examples is provided by the sphinx-gallery package.
Using Markup
There are three main kinds of markup that should be used: italics, bold
and fixed-font. Italics should be used when introducing a new technical
term, bold should be used for emphasis and fixed-font for source code.
Example:
When using object-oriented programming in Python you must use the
class keyword to define your classes.
In restructured-text markup this is:
when using *object-oriented programming* in Python you **must** use the
``class`` keyword to define your *classes*.
Linking to package documentations
The goal of the scipy lecture notes is not to duplicate or replace the documentation of the various packages. You should link as much as possible to the original documentation.
For cross-referencing API documentation we prefer to use the intersphinx
extension. This provides
the directives :mod:, :class: and :func: to cross-link to modules,
classes and functions respectively. For example the :func:`numpy.var` will
create a link like numpy.var().
Chapter, section, subsection, paragraph
Try to avoid to go below paragraph granularity or your document might become difficult to read:
=============
Chapter title
=============

Sample content.

Section
=======

Subsection
----------

Paragraph
.........

And some text.
Clearing floats
Figures positioned with :align: right are float. To flush them, use:
|clear-floats|